Weddings · 4 min read
How do you plan your wedding seating chart?
A seating chart is the part most couples put off, usually because it feels like a puzzle with too many moving pieces. The trick is to not start too early and to build the room before you place a single name. This post walks through when to begin, how to lay out your tables and key spaces, and how to seat guests without getting stuck on the tricky groupings.
Wait until your RSVPs firm up
Do not build the chart from your invite list. Guests decline, plus-ones change, and a table you carefully filled can fall apart with two late no-shows. Start once most replies are in and the numbers are close to final.
Keep your guest list as the single source of truth. In the Wedding Planner you track RSVP status and dietary notes in the Guests section, and that confirmed headcount is what you seat. If someone drops out later, update it there first, then adjust the table.
Sketch the room before you place names
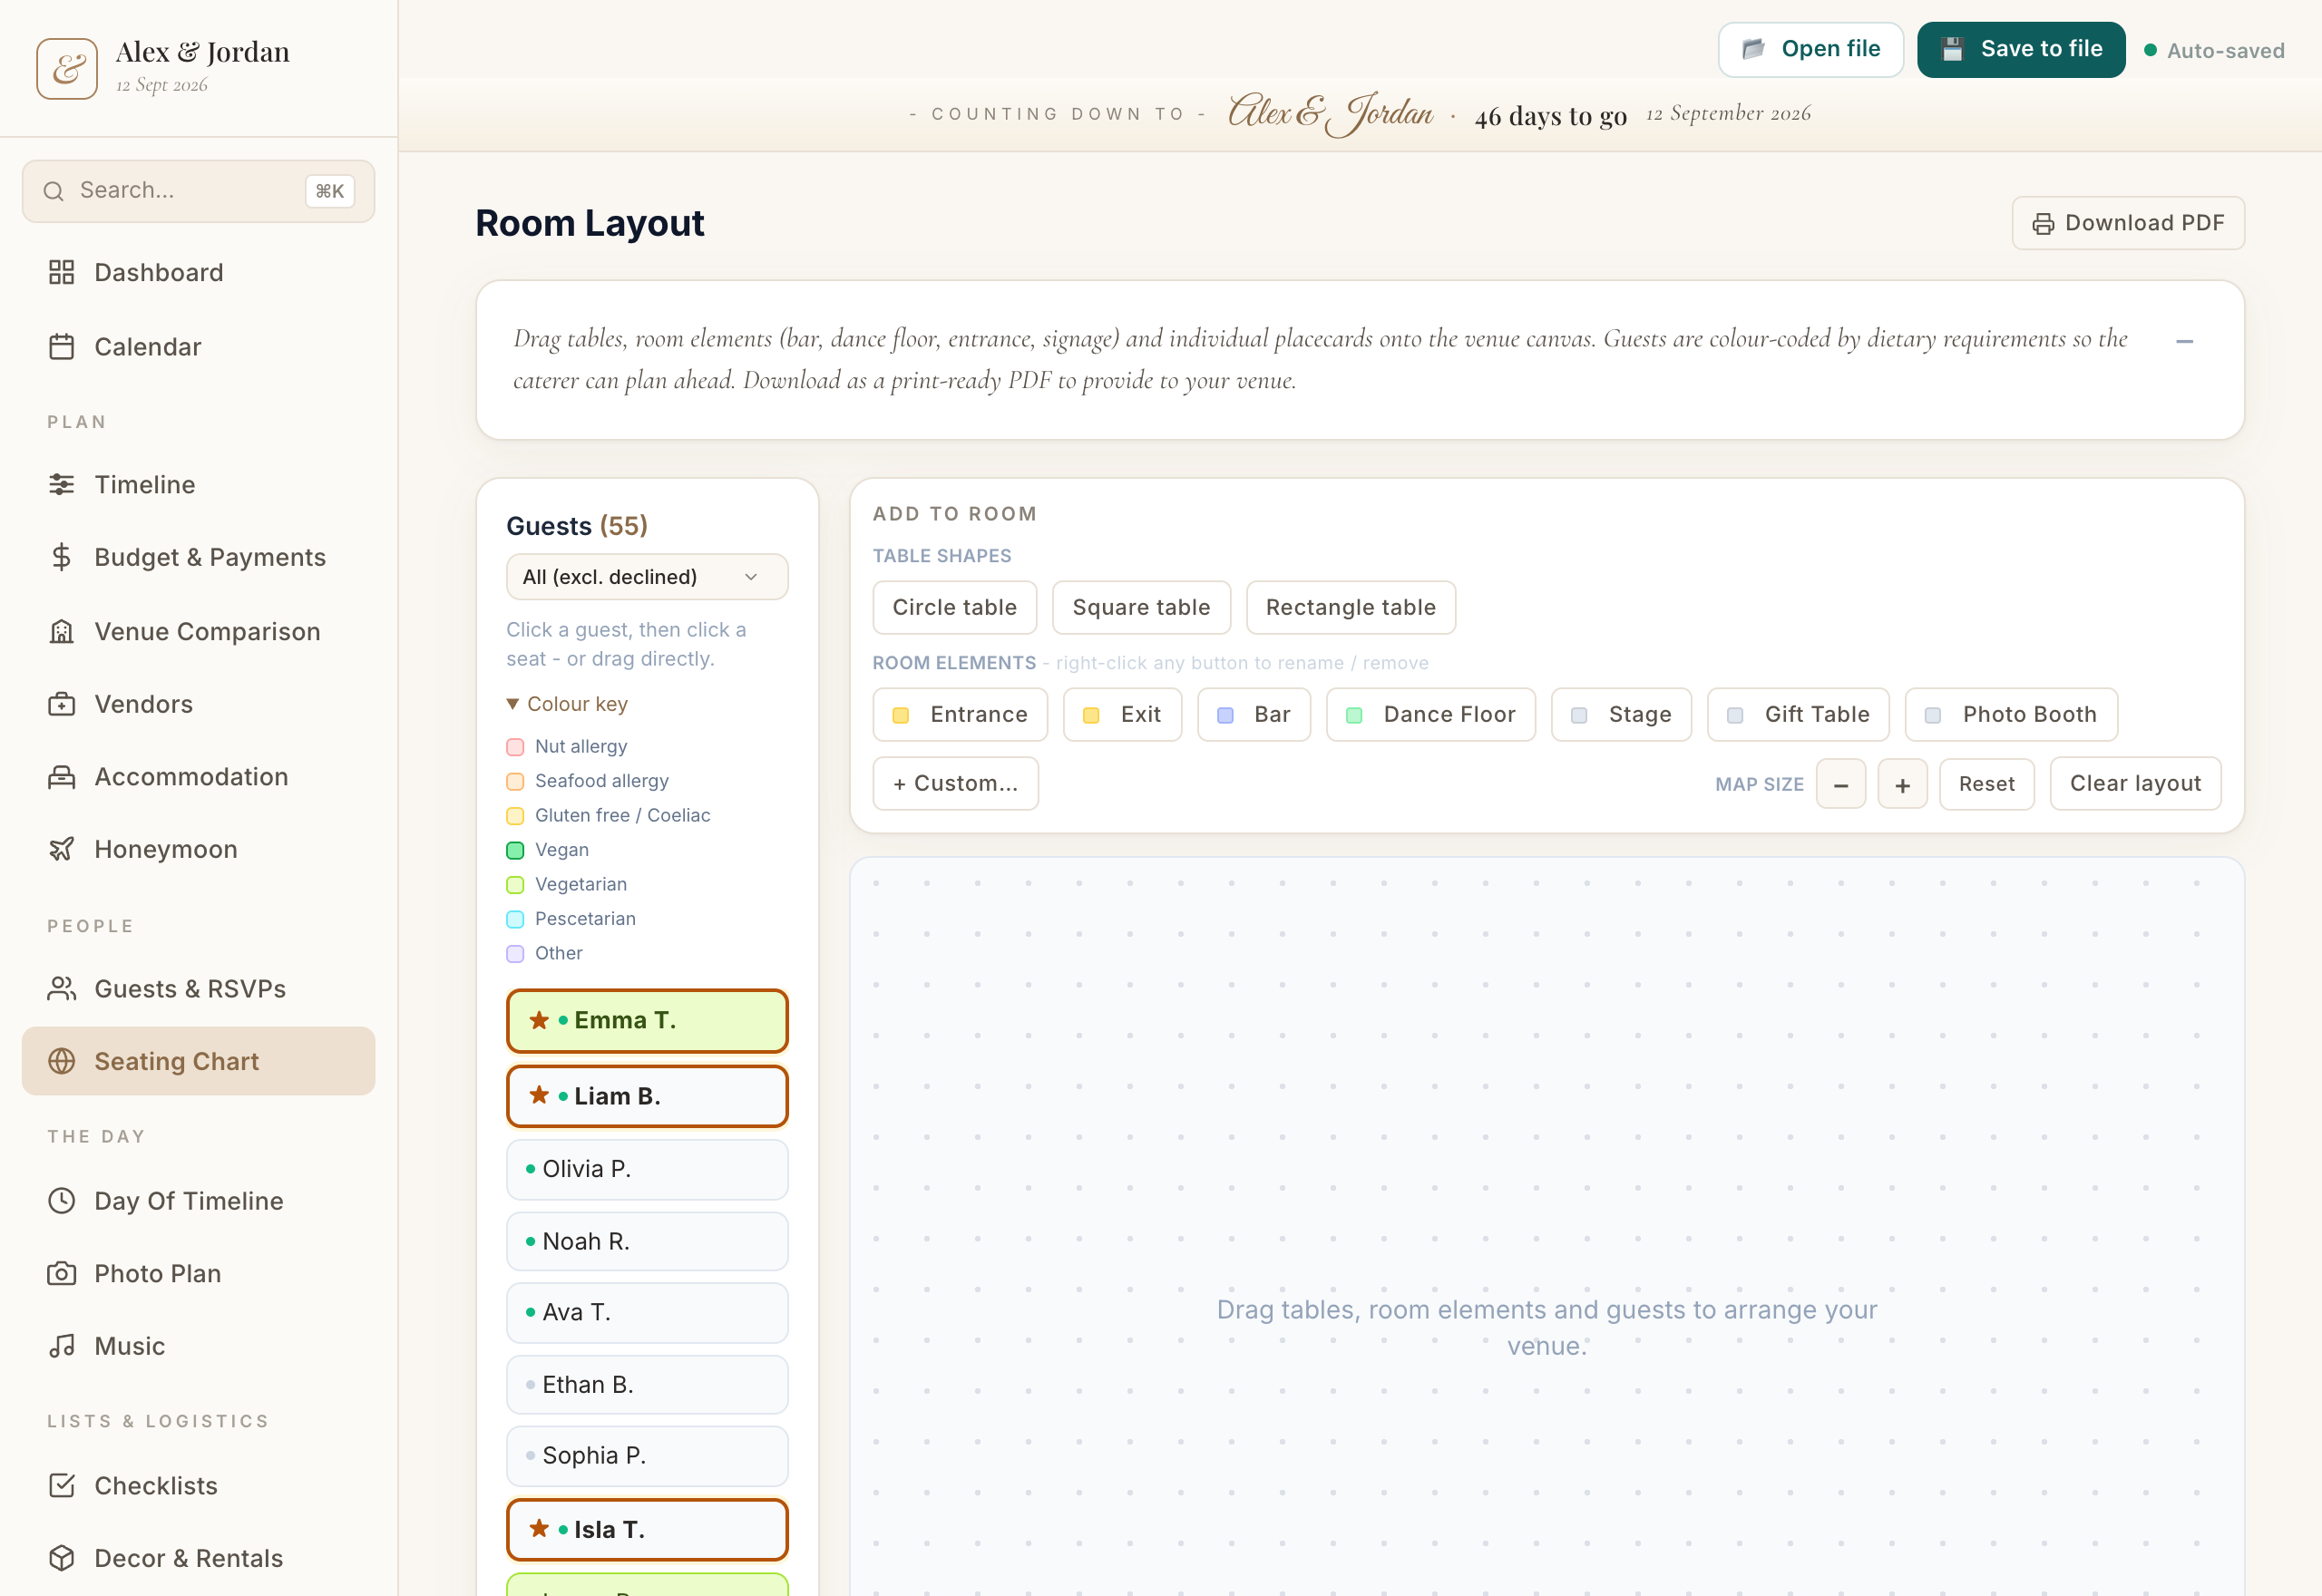
Draw the space first. In the Room Layout section you get a 2D canvas with a dot grid, and you drag on round, long or small tables to match what your venue offers. Place the fixed points too: the entrance, the dance floor, the bar, the stage, the gift table and a photo booth if you have one.
Getting the room right early saves the most rework. You will want older guests away from the speakers, the bar within easy reach but not blocking the flow, and top-table sightlines clear. Move tables around until the shape feels right, then start seating.
Assign guests, tricky groups first
Click a table to assign guests to its seats. Start with the hardest groups while the room is still mostly empty: divorced parents, friend circles that do not mix, and anyone who needs step-free access or to be near an exit. Seat those first, then fill the easy tables around them.
Group by something people share, a side of the family, a shared era, a hobby, so every table has a natural conversation. Leave one flexible seat or two if you can, because a late change is far easier to absorb when you are not reshuffling the whole room.
Keep the chart in step with the list
A seating chart is never finished until the day. Every time your guest count moves, walk it back through the layout so the two never drift apart. A confirmed decline frees a seat, a late yes needs one.
Once it settles, use the plan to brief your venue and caterer on final numbers and where each table sits. Because the headcount also feeds catering and budget, a tidy, current guest list keeps all three lined up.
The app that helps
Wedding Planner
Everything you need to plan your wedding, in one place.
- Lay out your room on a 2D canvas, dragging on round, long and small tables plus the entrance, bar, dance floor and other fixed spaces
- Click any table to assign guests to its seats, so the chart matches the room you have drawn
- Track RSVP status and dietary notes per guest, with the confirmed headcount driving what you seat
Common questions
When should I start the seating chart?
Once most of your RSVPs are in and the numbers are close to final. Starting earlier usually means redoing tables as replies change, so it is worth the wait.
Do I need assigned seats for everyone, or can I leave it open?
Both work. Open seating is simpler but can leave guests hovering, while assigned seats give you control over the tricky groups. If you assign seats, the Room Layout lets you place each guest at a specific table.
A quick note
This is based on our own wedding and what worked for us, shared as general information rather than professional advice. Costs and customs vary a lot by location and vendor, so treat any numbers as a starting point and get your own quotes.